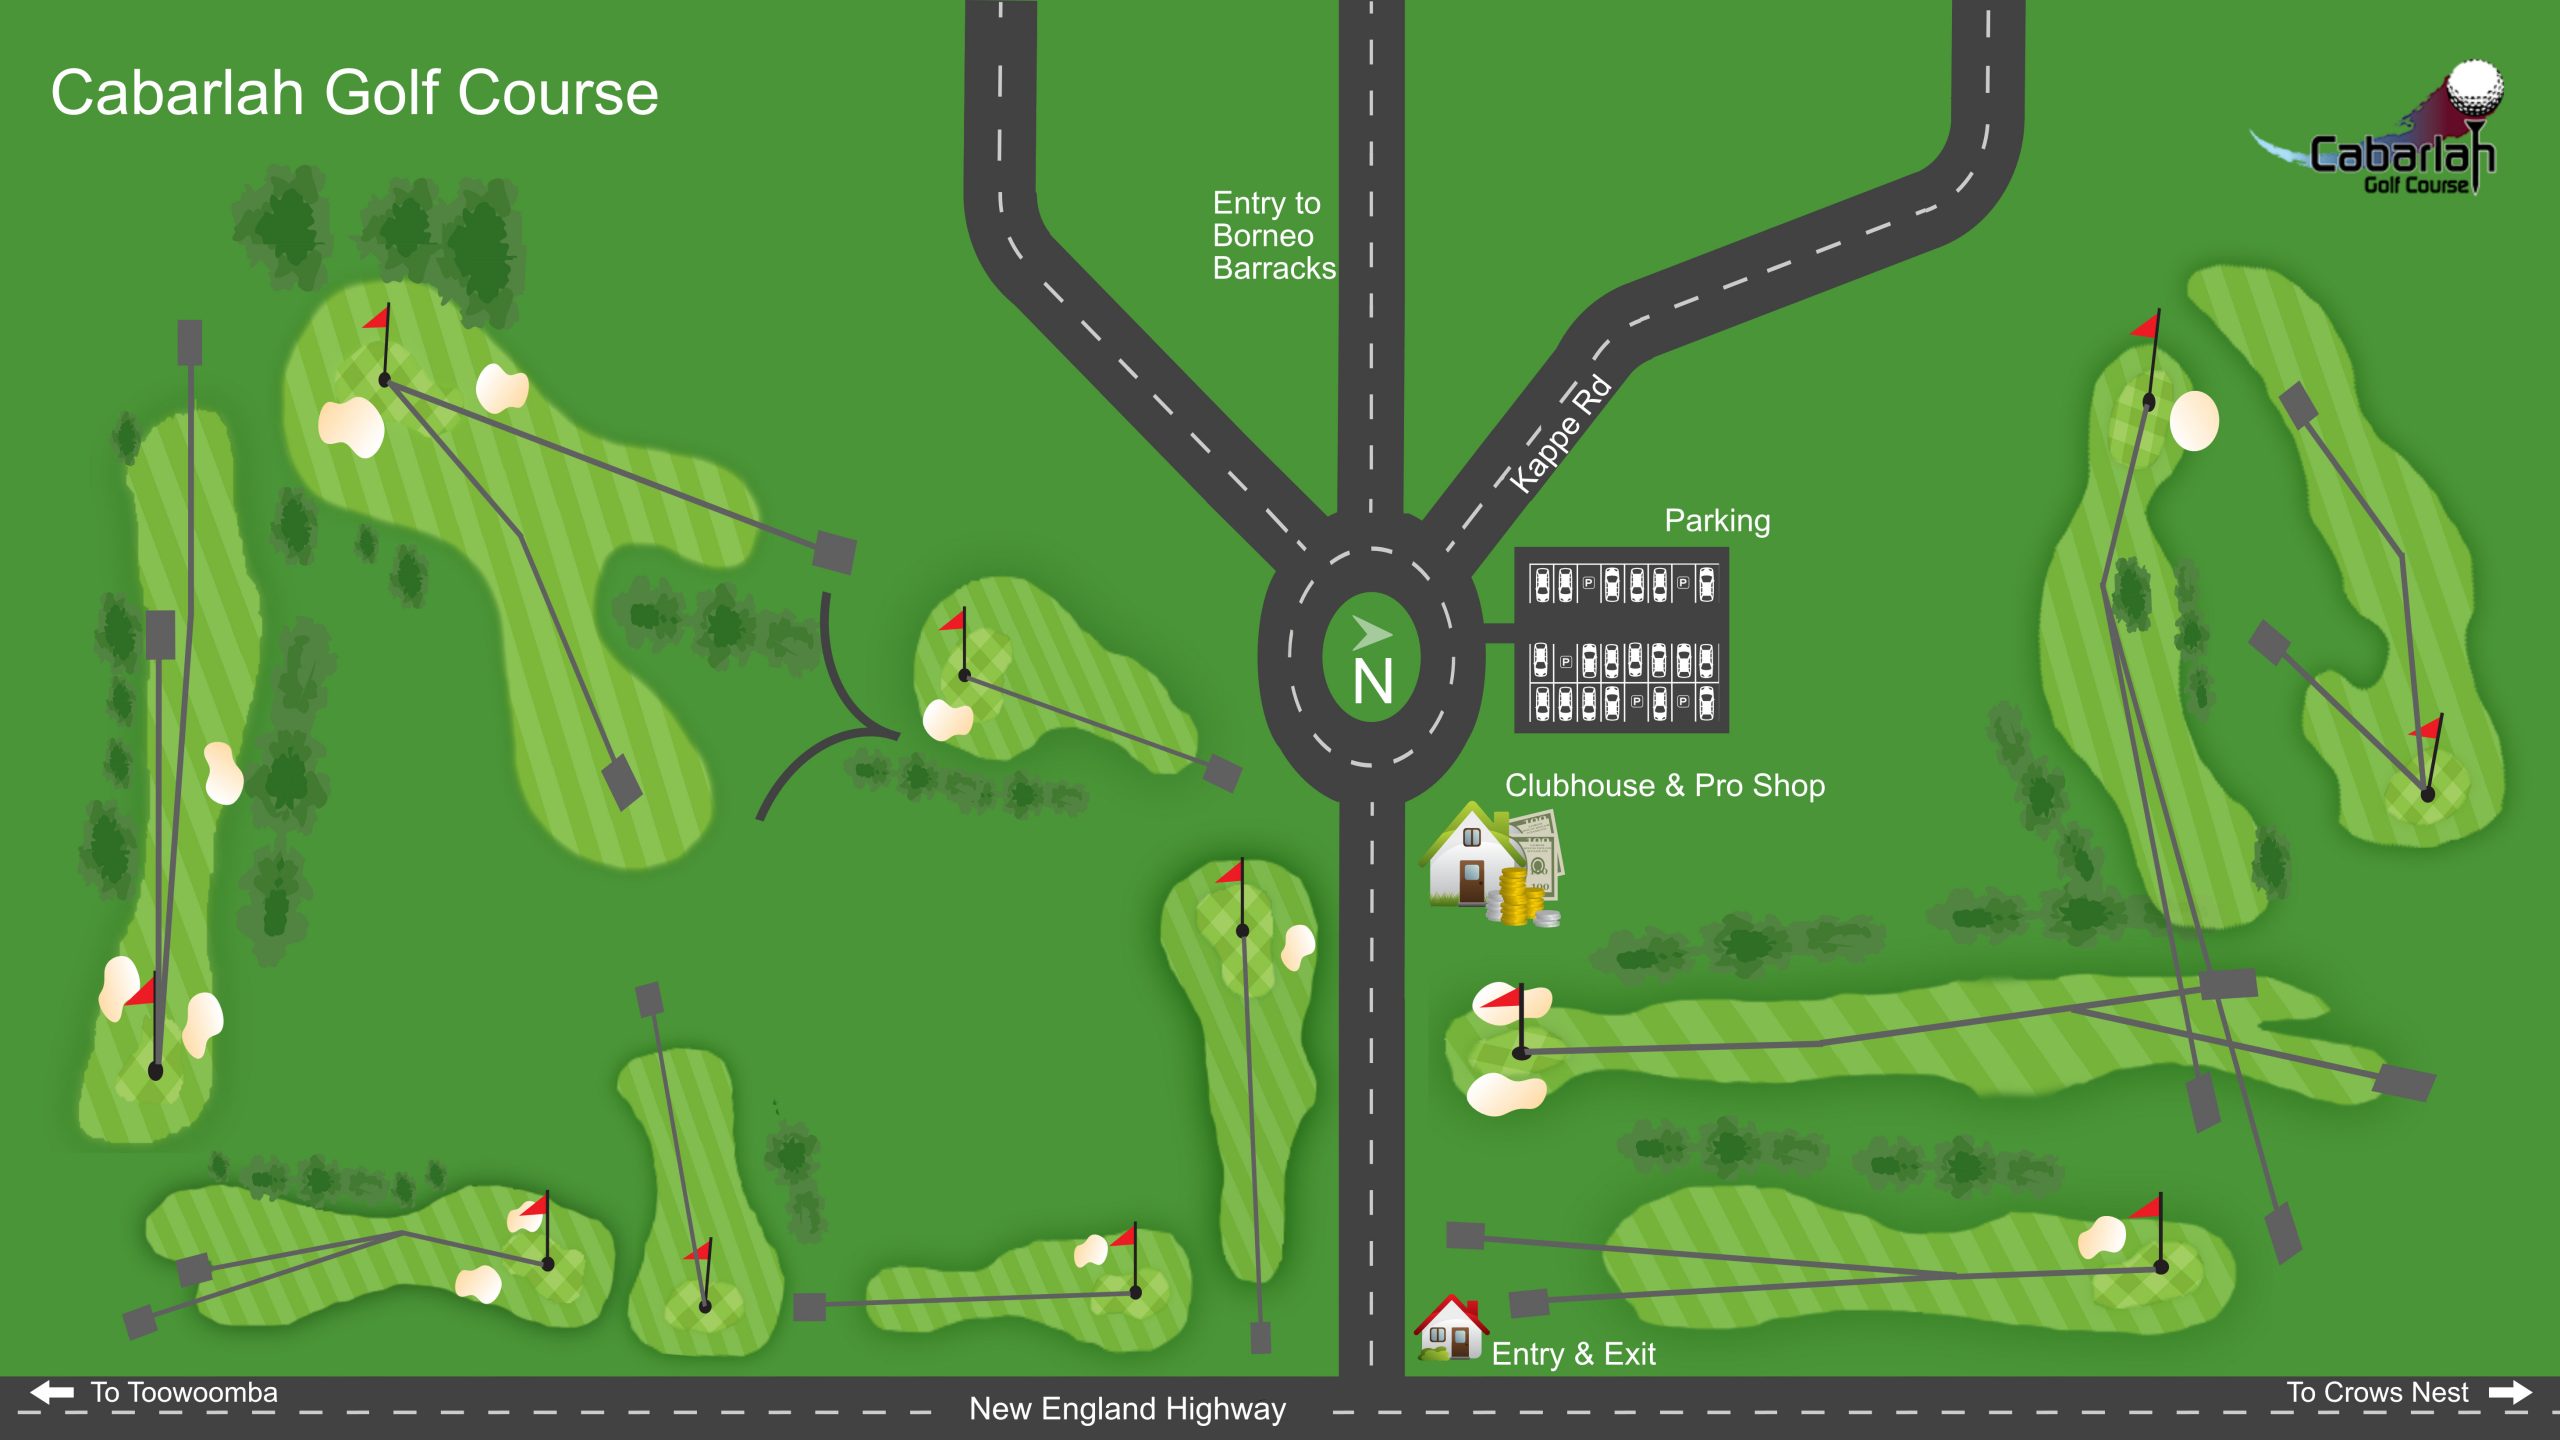
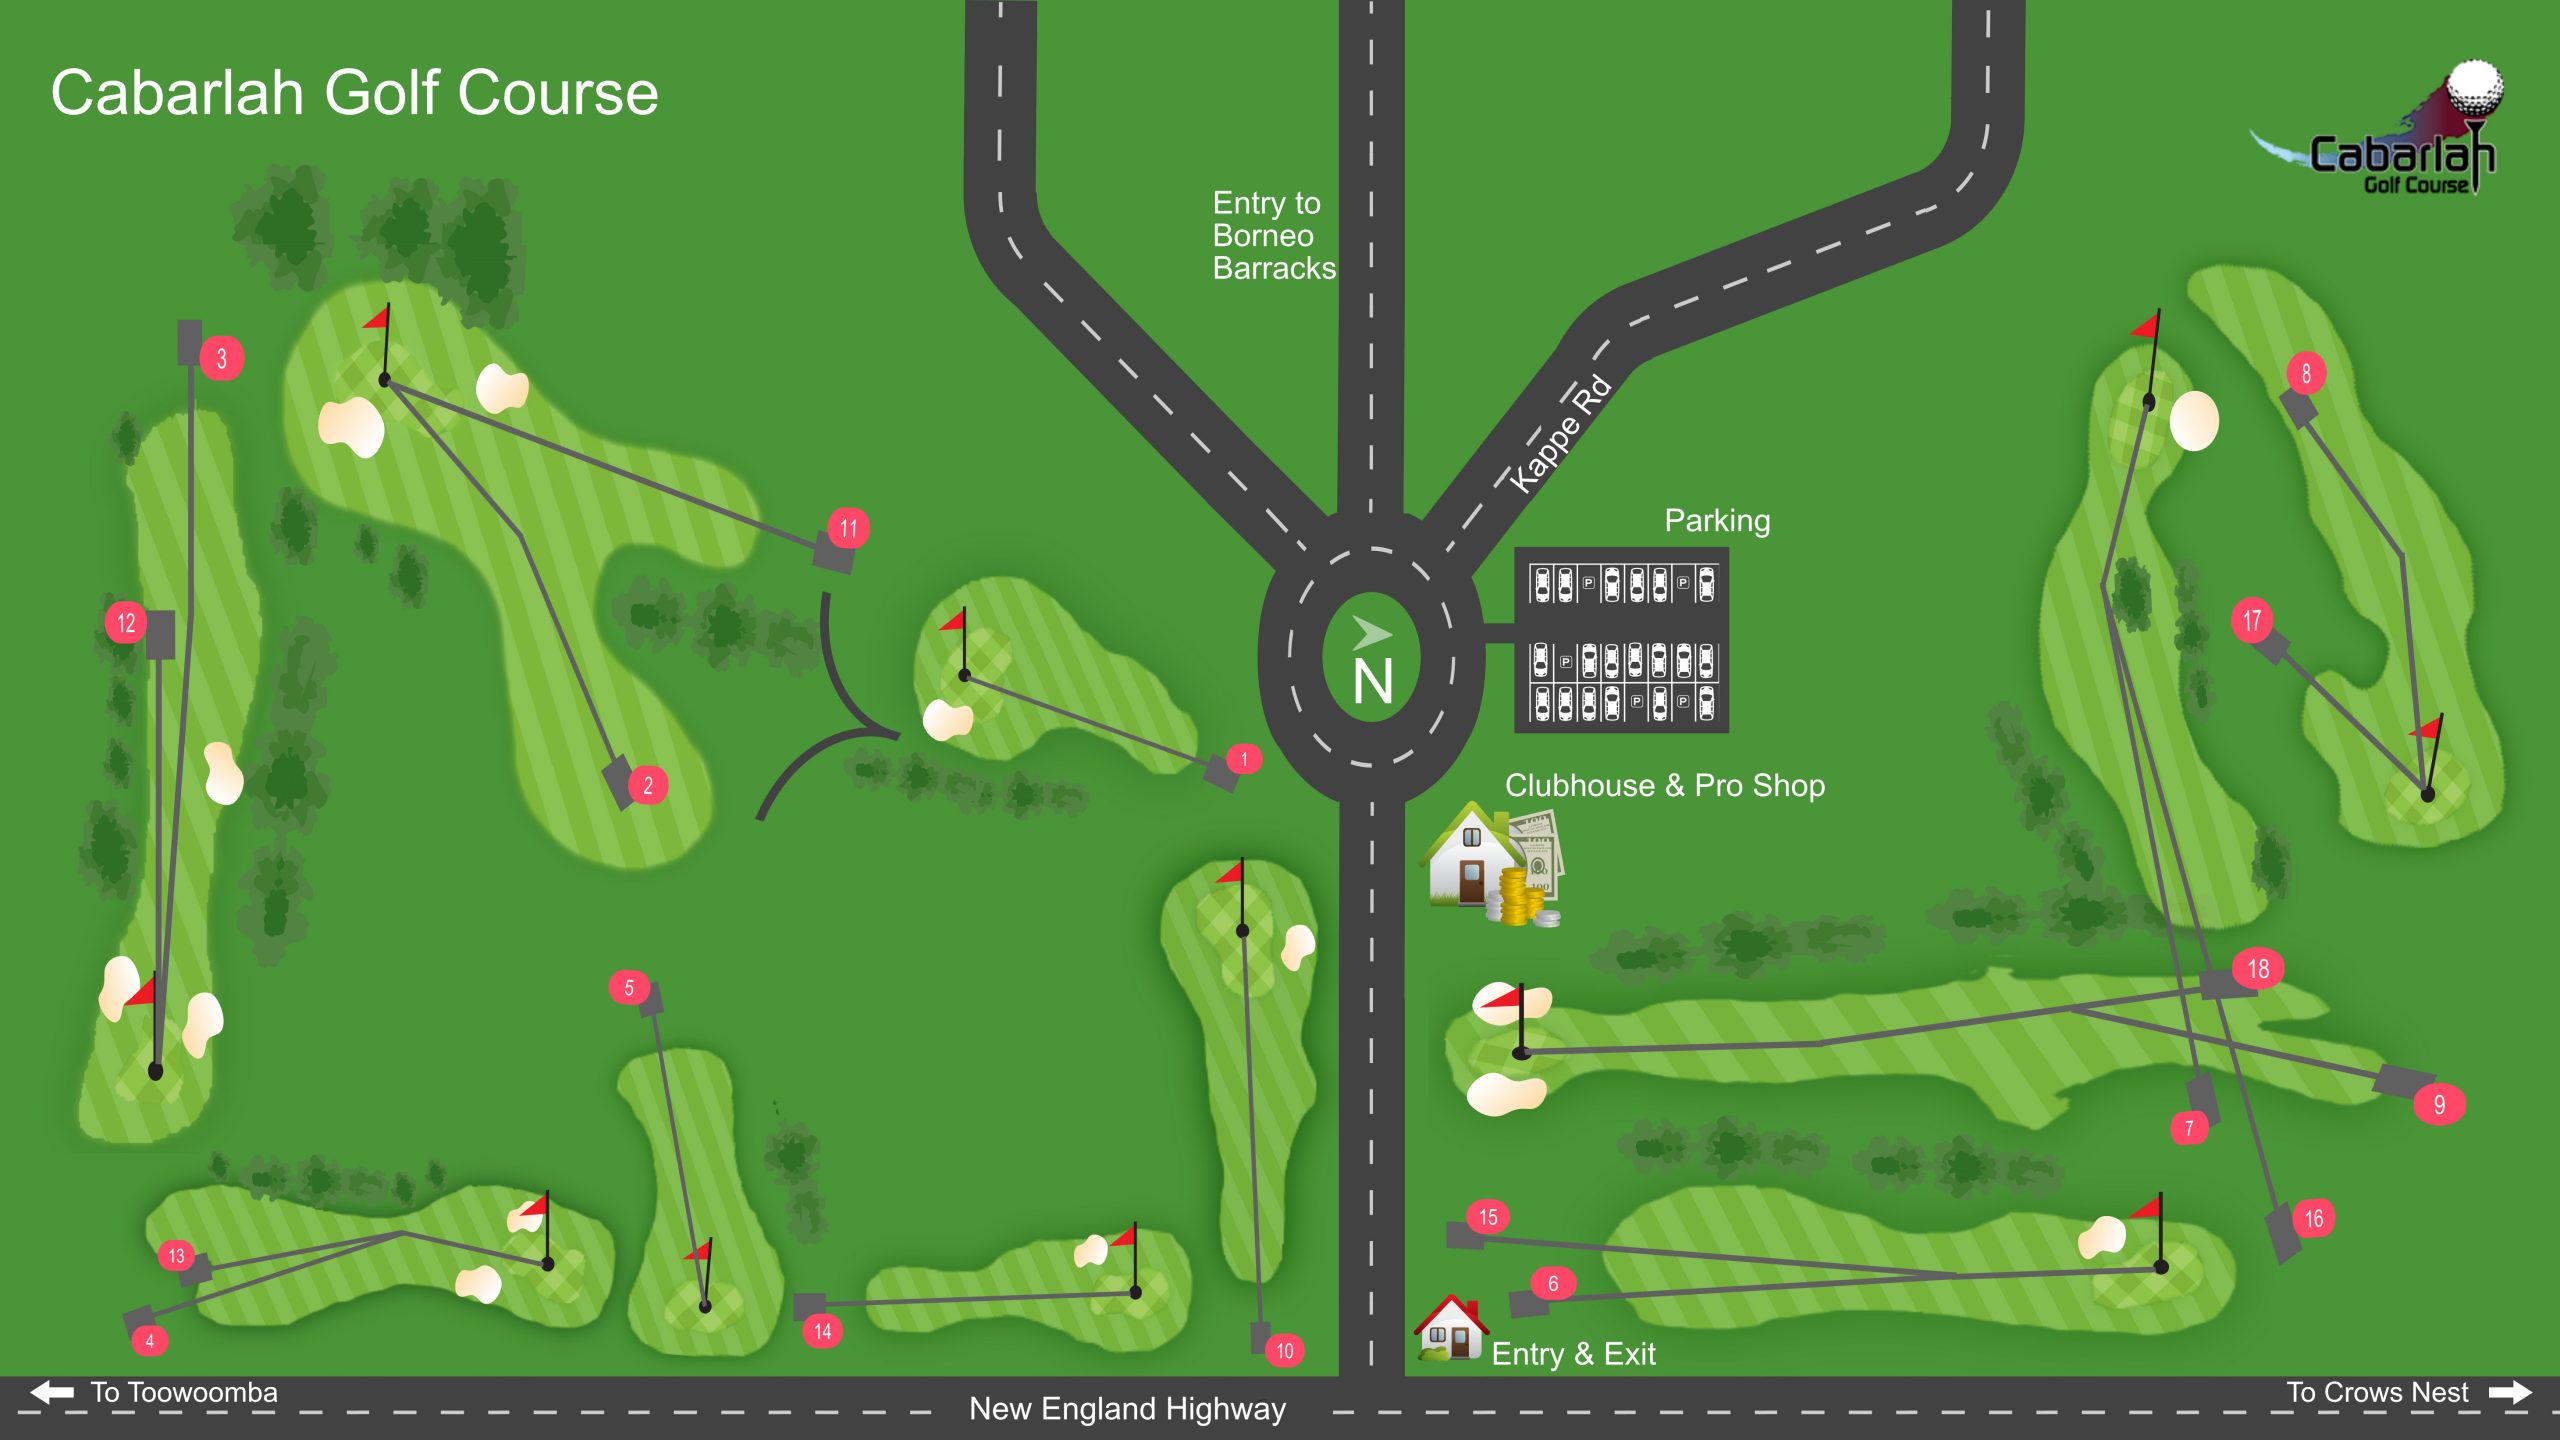
Hole 1: Par 3. 113 m.
A relatively comfortable opening hole to a large green. Players need to be wary of the O.O.B along the full length of the left side of the fairway.
Hole 2: Par 4. 277 m.
A good drive to the centre of the dogleg fairway will set up a short approach of 100 meters to a two-tiered green.
Hole 3: Par 5. 395 m.
Only the longer hitters will reach the fairway bunker on the left hand side of the fairway, but it is the best side to approach the green from. Tall trees and greenside bunkers add to the difficulty.
Hole 4: Par 4. 318 m.
Short but tricky. With O.O.B. down the right-hand side the full length of the hole, the drive needs to be placed to the left side to get a clear shot at the green and to avoid the trees and the well placed bunkers.
Hole 5: Par 3. 141 m.
Players cannot go long on this hole, as the O.O.B. is directly behind the green. Players will need to avoid the trees short and left of the green.
Hole 6: Par 4. 358 m.
A difficult hole with trouble on both sides of the fairway. The sloping fairway makes a well-placed drive imperative The sloping green can lead to the left hand bunker.
Hole 7: Par 4. 300 m.
The fairway slopes to the right so a well struck drive to the left side of the fairway is required. The next shot is uphill with a blind shot to a small sloping green.
Hole 8: Par 4. 293 m.
Long hitters can unleash on this downhill Par 4. The fairway widens at the 150-meter mark and leaves a tough shot to a well elevated green.
Hole 9: Par 5. 461 m.
A wonderful Par 5 known as the Dirty Dozen. A precise drive and solid fairway shots will leave most golfers with a short 50 meter pitch shot with O.O.B. behind the green.
Hole 10: Par 3. 154 m.
A Par 3 Sleeper that plays longer than it looks. All chip shots are quite tricky. A Par 3 is a good score.
Hole 11: Par 4. 262 m.
The shortest Par 4 on the Course and reachable for the longer hitters in 2. A great birdie chance.
Hole 12: Par 4. 315 m.
An extremely difficult Par 4 where your drive needs to avoid the fairway bunker on the left. The second shot will need to be well shaped to avoid trees and greenside bunkers.
Hole 13: Par 4. 306 m.
Another perfect drive is needed here to the left centre of the fairway which is heavily treelined left and right. An approach from the left side will provide a clear shot to the large green.
Hole 14: Par 3. 175 m.
This long Par 3 does claim some scalps, with O.O.B. down the right side of the fairway.
Hole 15: Par 5. 385 m.
A drive to the right side of the fairway will leave clear shots to the green.
Hole 16: Par 5. 373 m.
One of the best holes on the course. It is difficult to clear the penalty area with the drive, then a fairway wood is required to get up the hill. The blind green is downhill from the top.
Hole 17: Par 3. 140 m.
Players must strike a perfect drive from an elevated tee to an elevated green onto the trickiest putting surface.
Hole 18: Par 5. 420 m.
A wonderful finishing hole, requiring a well struck drive followed by two good fairway woods will set up a pitch.